Friday, November 30, 2012

Glycemic Load Update

Someone send me a message asking how the diet was going. Sorry I haven't updated or posted in a few weeks, I guess if you aren't on my personal facebook you won't know that on day 5 my whole family got that horrible, nasty stomach virus that is making the rounds. To say it has been a miserable few weeks is an understatement. It's a bad one and one of my friends ended up in the ER after having it because she got so dehydrated. It's not a 24 hour bug sadly, more like a week long one. Just when you think you are done it starts again. Then it takes a few more weeks to recover.

Of course having a 2 year old and a 4 year old with it was the hardest part. I would rather go through it three times myself that have to watch them.

The doctor's advise was a BRATTY diet Bananas, Rice, Apple Sauce, Toast, Tea and Yogurt. Well Bananas are out for me because just the smell can make me want to throw up (long story but my brother is involved!). And well Rice and Toast aren't really GL ideal items. I guess because tea and toast was always the cure for every aliment and problem growing up that I naturally went that directions plus lots of yummy yogurt. (I found this new yogurt at Target from Colorado and it's delicious but more about that later). I had to trade of GL diet for getting better.

So until about Thanksgiving all I was able to eat was tea, toast and yogurt. 

Thanksgiving dinner was so welcome, yummy turkey was just what my tummy needed. I did indulge a little with some roast potatoes, sweet potatoes and stuffing, but on the whole I behaved myself. 

Since then I've been so extremely busy that food has been way down on the list of things but I have tired to limit my starches. I'm not living a carb free life but I'm eating less than I used to. Like a friend that has the same condition and is on the same diet said sometimes you have to indulge a little. 

So in case anyone was wondering things haven't been going too well but probably picking my busiest time of the year was not the best idea. So it's baby steps. And I'm really excited that I have found a Beach Body coach that is local and super sweet. I've started my P90x again. At the end of the day it wasn't changing my diet that added the extra weight it was reducing my exercise. I have even stopped taking the Metformin and this time I think for good. It's so hard to take and honestly I don't see any improvement in the symptoms, I just add nausea to them. I'm not diabetic and after numerous letters from my health insurance company about good control of diabetes I want to go shout at them I AM NOT DIABETIC I have PCOS, which means I'm hormonally unstable (think about that one people, ha ha ha!). 

Yes diabetes is one of the long term effects of PCOS but so is heart disease and numerous other serious illness and with a bad history of heart disease in my family and little diabetes I'm thinking my heart rather than my blood sugar needs more attention. Plus my blood sugar, and insulin levels have always been perfect, especially during pregnancy when the PCOS makes you high risk for gestational diabetes.

I just want to be fit and healthy and it's going to be a process that takes time for me. Other people may not have the same struggles making changes, we all have our own battles and demons.

Anyhow I better sign off because tomorrow is my son's 5th birthday party and there are cookies and cupcakes to make. So let the powdered sugar flow because this Home Cooking Mama has to get baking, just not eating!!! Can't wait to post the pictures.

Happy Home Cooking!

Sunday, November 11, 2012

Breakfast dilemma!

Breakfast! We have been told for generations that its the most important meal of the day. I have to say I've been good and bad over the years, however it has varied.

Recently I've been eating Weetabix cereal, it isn't easy to find here in the States. A little milk and a sprinkling of sugar, lots of yummy fiber. Alas no more! Weetabix is a cereal and cereals, with the exception of muesli and all bran, are on the no no list!

So what else can I have. I love some hot toast with Nutella spread. Problem - toast is bread. The thought of a spoon and the jar of Nutella crossed my mind but even though Nutella has a low glycemic load it has sugar, so I'm pretty sure eating the jar is not a good breakfast! I can still have sugar in extreme moderation, I emphasize EXTREME.

Another favorite in this house is cinnamon rolls, I'm particularly partial to the orange frosted ones. Yet again falls in the bread category.

Man our breakfasts are so not helpful to a low glycemic load lifestyle. Ok now what can I have that I have in my kitchen?

Well meat is ok so lets hit the bottom of the fridge where the bacon and sausage live. I have to admit I will never become Jewish because I have an incredible addiction to all things pork!!! So bacon and eggs here I come. My plate will feel empty, remember I grew up on good old fashioned Ulster Fries! If you have never had one you have never lived!!! Bacon, eggs, tomato, soda bread and mushrooms are your basic, depending on the chef. So my plate will be lacking bread. Like I said yesterday my brain is going to have reprogram itself.

Dr Thompson does have some yummy recipe ideas for breakfast that I will have I explore some more. But for this Sunday morning its sausage, bacon and scrambled eggs. I don't have any tomatoes otherwise I'd grill some. Then a few green grapes to fill me up. I have to say I didn't miss the toast as much as I though I would.


You know I think I could probably do with taking a walk today too. Dr Thompson's plan for exercise is basically 20 - 30 minutes walking every day which considering I used to walk everywhere and now don't, this could be a huge start!

Well that's the first breakfast over and I survived!!! A meal at time is how I'm going to have to take it. 

Happy Home Cooking!!!!


Saturday, November 10, 2012

I didn't wait for Monday!

I spent today reading the book Glycemic Load Diet by Rob Thompson, M.D.


My husband had asked me the other day when I would start my diet and I told him Monday but after reading it all day I figure why not start today. Plus Dr Thompson has me completely convinced starches are toxic!

So tonight for dinner fried chicken. So chicken is good. My problem lies with the side dishes. After getting over my initial shock that I was frying EVERYTHING, the realization kicked in - fries are potatoes, my beloved potatoes. So no fries for mama!!! I have heard people substitute cauliflower for potatoes. I like cauliflower, that's very doable! Plus the glycemic load is 0!!!

So my first attempt at a potato alternative involved steaming some cauliflower florets then adding 2 ozs of finely grated La Gruyere cheese. Then using a fork I mashed them a little and mixed the cheese till it melted. The Gruyere just gave it that little extra something. It needs a little work but I think life after potatoes will not end up in another Irish Famine style disaster for me! I didn't even seek one of the boys French fries!!!


So time for a cup of tea!!

Happy Home Cooking!

A new journey!

It's a big day in Home Cooking Mama Land. I know I've mentioned it before but back on February 14th 2007 I was diagnosed with Polycystic Ovarian Syndrome. It's a weird thing because I don't fully get how all the components come together but basically it's a hormonal imbalance with can lead to infertility and diabetes. Somehow the drug metformin, which is mainly used to treat diabetes, helps.

Well I'm not diabetic, and even during pregnancy was no where near gestational diabetes. But there is a family history, so I have to some serious work if I don't want to end up with it. However I do have a tough time with hormones and irregular periods.

Not a day goes by that I deal with PCOS that I don't thank God that the boys were conceived quickly and the pregnancies successful. I know too many sufferers that battle with this and one dear friend that I'm praying hard for right now. At 7 weeks with my first son they found blood in the sac which is a sign of miscarriage. Thank God (and I do give God all the glory) there were no further issues and he's now my wild man running around digging my yard up and about to turn 5.

I never really gave my body time to correct the PCOS because I was pregnant within 3 weeks of being diagnosed. I then breast fed him for 18 months and 3 months later I got pregnant with my second son. I nursed him until he was 22 months. Honestly as a mother breast feeding was one of the most amazing experiences of my life. To provide my boys with perfect milk for so long was a privilege.

Well it's been 10 months and now my body is returning to a normal state, well maybe a non pregnant/breast feeding state would be better because normal is not normal. I had to stop taking the metformin because it was tearing my stomach up and over the past month I've been getting back on it. My doctor had put me on a good birth control pill to regulate the hormones but it wasn't working. I would get horrible migraines the days I didn't take the hormones and the first week of a new pack I felt like a monster she-devil! I saw my endocrinologist and his suggestions weren't too exciting but switching to seasonique (the pill you take constantly for 3 months) seemed to be the best option. But I was also told the weight had to come down. Why is that always so much easier said than done?

I told him I had been trying to do the work out program P90x, and had actually lost 2.5 inches off my waist and hips but had gained 10lbs (muscle weighs more than fat). The only problem has been consistency, my life is crazy and finding the time has not been easy. Having a strong support network is so critical to these things and I just haven't set myself up well for that.

I adore my Ob/gyn doctor, he's such a nice man and I really take on board his advise. He told me to try the Glycemic Load diet. I had actually read about this in a PCOS book but until now have not really looked at it. I had followed a lot of the suggestions from that book like getting rid of processed food.

I have a friend that a few years ago cut all carbs and sugar completely from her diet. She has seen amazing results and looks amazing now but I don't have her level of discipline and the thought of never eating chocolate or potatoes again just seemed scary.

So after I saw my doctor Wednesday I order the book. It came Friday and I've been reading it non stop. After the first few chapters all the talk about starch toxins had me mourning the loss of my beloved potatoes, bread and pasta. In my head it all makes sense but I have to reprogram my brain.

The good news is that chocolate and coffee do not have to go. He actually encourages a piece or two of chocolate to help ease the starch cravings, and I know there will be many. And my beloved coffee is here to stay!!!

One thing that did stick out was exercise. PCOS is something you always have but doesn't necessarily manifest itself. Mine didn't until I moved the USA back in 2003. One of the main changes in my lifestyle was that I went from walking EVERYWHERE to not. South Louisiana is not conducive to walking, it's hotter than hot. Baton Rouge is a lot different to Belfast in that the city is very spread out. My inactivity has been my downfall. Plus to a certain extent, marriage has not helped. I used to just eat when I was hungry, now I cook to schedule. Trust me I've enjoyed every bite that added the pounds on. Nobody created this situation but me.  

So I'm going to give it a go and I want to invite you all along with me on this adventure. Home Cooking Mama is starting a new journey to a world where starch is for ironing shirts and I will take control of my health.

My New Years resolution for 2012 was to be healthier and happier and well as the calendar seems to pass quicker and quicker I have to say I didn't really succeed. But there is still hope and there is always 2013!

Happy Home Cooking!

Wednesday, October 24, 2012

My Back Up Singers

'No man it an island' I believe is what they say, and I think this applies to cooks as well, 'No cook is a kitchen island'. So I want to introduce you to 5 members of my culinary team...


First up is Plymouth, she is my favorite. She is so friendly, I highly recommend Plymouth Rocks. She has been known to come sit on the arm of the swing with us and on many an occasion has tried to get into the house. I guess she thinks she really is part of the family. 

Plymouth Rock

Then there is my Rhode Island Red, she's one of my most reliable layers.

Rhode Island Red
Then we have Cuckoo, she is a french Cuckoo Maran. She lays the most beautiful dark chocolate brown eggs that are beyond fantastic to bake with. The place we got her told us that they supply to bakeries that will only use their eggs for baking. I have to say that I do notice a difference. She does have an a little attitude and isn't the friendliest, French Madam!!!

Cuckoo

Next up, we have Sexlink. She's a cross and I'm not sure what. She's a great layer too. 

Sexlink
Then we have Beauty, she is an Australorp. I have to say that as pretty as she is she is my least favorite and she is extremely skittish and has been an escape artist since we got her. But still her eggs are yummy.

Beauty

I haven't bought store eggs in almost 3 years and I have noticed such a difference in the quality of cooking, especially baking. I no longer have issues with my cheesecake cracking and the cupcakes are so much better.

We all have a back up team in the kitchen, the store we buy our groceries from to the farmers that grow the products. As I've learnt over the last few years it nice when the distance between you and that person or thing is greatly reduced. You would be amazed how long an egg stays good, makes you wonder how long it's been since those store eggs were laid.

We did have a garden too for a while but that takes alot of time and effort. Although having fresh home grown vegetables is wonderful. We have been blessed this past year through one of the foresters my husband works with, he doesn't have green thumb he has two green hands. The beautiful vegetables he has blessed us with is amazing.

Anyhow just wanted to introduce you my ladies.

Happy Home Cooking from the Home Cooking Mama Chickens!

Tuesday, October 23, 2012

Made From Scratch Beef Fajitas

I am so proud of myself. One of my aims has been to completely replace processed food in our diet and find a way to make our favorites from scratch. Well for the longest time Beef Fajitas were my quick and easy open a packet go to meal, the seasoning was prepackaged, the tortillas were prepackaged. Recently for dinner I made Beef Fajitas from scratch, the seasoning was my own and the tortillas were completely homemade.

I cannot begin to tell you how delicious and superior this seasoning is to the McCormick pack. Now I'm not criticizing McCormick, they have been a faithful friend in my kitchen. However I have become more conscious of the label on food. McCromick's Fajitas Mix ingredients are: Spices (including Cumin, chili pepper, and oregano), corn maltodextrin, onion, onion salt, corn syrup solids, garlic, citric acid, caramel color, lime juice solids, modified corn starch and natural flavors. Now in the grand scheme of things that doesn't sound too bad and maltodextrin isn't the worse additive as it's actually from food not chemicals. However I know that glucose based items aren't usually that good for blood sugar. I do wonder why 'caramel color' is required!

I've posted the recipe for the tortillas before and once you have made them from scratch and see how easy they are and how awesome they taste you will have a hard time buy them at the store. 

So here is the recipe for Made From Scratch Beef Fajitas. Trust me these are the best fajitas, my father-in-law even loves them and he's a really picky eater!!!!


Beef Fajitas


 Seasoning
2 tsp chili powder
1 tsp salt
1 tsp paprika
1 tsp sugar
½ tsp onion powder
½ tsp garlic powder
¼ tsp cayenne pepper
¼ tsp oregano
¼ tsp cumin

Tortillas
2 ¾ cups (about 12½  oz) unbleached all-purpose flour
1 tsp baking powder
¾ tsp kosher salt
5 T (2 ½ oz) vegetable shortening
¾ cup very warm water

Fajitas 
1 lb sirloin beef
2 T vegetable oil
1 red bell pepper, cut into strips
1 green bell pepper, cut into strips
1 yellow bell pepper, cut into strips
1 red onion, cut into strips


Directions:

1. Mix all the seasoning ingredients together.


2. Cut up the beef into strips and place in a bowl. Add the seasoning and mix to completely cover.


3. Let the meat marinate in the fridge for at least an hour. You can also freeze the meat marinated.
4. To make the tortillas: in a bowl, using a whisk, combine the flour, baking powder and salt. Add the shortening (and/or lard) and rub into the flour mixture until well incorporated.
5. Gradually mix in the water until the dough comes together. It should be a medium-stiff consistency, not a soft as bread dough but not firm either. Add additional water if needed a Tablespoon at a time.
6. Turn the dough out onto a floured surface and knead until smooth.


7. Divide the dough into 12 portions and roll each into a ball. Set the balls on a plate, cover with plastic wrap, and let rest for at least 30 minutes.


8. Flatten the ball of dough, flour it, and then roll forward and backward across it once. rotate a sixth of a turn and roll forward and back again; continue rolling and turning until you reach the desired circle size. Roll all of them before going to the next step. I've found that adding a little extra flour between them helps to stop them sticking together.
9. Heat 2 tablespoons of vegetable oil in a cast iron skillet. Add the beef and cook, stirring frequently.
10. When the beef has browned add the bell peppers and red onion and continue to cook until they are done. Don't forget to stir it!


11. While the beef is cooking, cook the tortillas. Heat an ungreased griddle or cast-iron skillet over medium to medium high heat.
12. Lay the tortillas on the hot skillet, there may be a little sizzle noise and you will see bubbling across the surface.


13. After 45 seconds or so, when there are light brown marks on the bottom, flip it over and cook for another 30 - 45 seconds until the other side is slightly browned. Be careful not to leave it too long or it will become crispy. Remove from the skillet and place on a dry cloth. Repeat the process with the remaining tortillas and stack them one on top of the other on the cloth.


14. Serve immediately and with all the additions you like, cheese, sour cream, salsa, whatever takes your fancy.


Happy Home Cooking!!!


Monday, October 22, 2012

Home made tacos

Sorry for my absence but life gets so hectic sometimes.

But I'm back!!! And my mission to remove the processed food from my family's diet continues.

Today Tacos. For years I've used the old El Paso kits and seasoning. Honestly there was nothing too wrong with that, tacos were a quick easy meal! Then I started making the fajitas from scratch and they were delicious. Then I made the prepackaged tacos and my husband didn't really care for them anymore, it seems that he has been ruined.

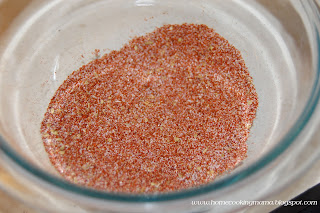
So I decided it was time to make my own taco seasoning. After all this is not a move that means I will be cooking for twenty more hours. I got my seasonings out, mixed them in the bowl and ta da no more pre-packaged seasoning. I reduced the amount of cayenne pepper because it had a little too much kick to it, although my husband liked that.

I adapted my recipe from Alton Brown's All American Beef Taco. I love the show Good Eats because he really strips recipes to their core and explains why and how the processes are the way they are. We recently changed cable companies and now get the Cooking Channel. Can I say how much I am enjoying it!

I have to admit that I used store bought taco shells, we all have to cheat a little right. But I do plan to figure out how to make them. Mr Brown did say how to make them into shells by buying corn tortillas but I decided to save myself that step this time.

Oh one quick note, you can go ahead and make up a jar of the seasoning and it will keep for a month in an airtight container. Although it takes such little time to mix it that you don't need to, but it could be a help, if time is short, to have some ready to use. As for cost well initially buying the spices might be more than a pack of seasoning but they will make many of a seasoning mix. I already had all the spices in my cupboard so it was simply a case of reaching in the cupboard.

Home made Tacos

Seasoning
2 Tablespoons chili powder
1 Tablespoon ground cumin
2 teaspoons cornstarch
2 teaspoons kosher salt
1 1/2 teaspoons smoked paprika
1 teaspoon ground coriander
1/4 teaspoon cayenne pepper

Put all of the ingredients in a small bowl. Using a hand whisk mix to combine. Store in an airtight container for up to a month.

Tacos
1 medium onion, finely chopped
2 cloves garlic, minced
1.5 lbs lean ground meat (mince meat)
1 recipe of seasoning mix
1 cup low sodium beef stock
Taco shells, lettuce, tomato, cheese and other favourite toppings as desired

1. Place ground meat, garlic and onions in a skillet and cook until browned, making sure to stir to break up ground meat.
2. Add seasoning mix and beef broth.
3. Bring to a simmer and cook, uncovered, until sauce is slightly thickened.
4. Heat taco shells according to package instructions.
5. Assemble as desired!

Happy Home Cooking!

Friday, July 13, 2012

Yesterday's project

Don't quite know why but yesterday morning I decided my freezer needed defrosted. I should have taken a before picture but believe me it really did look like the north pole, snow and all! I really wish we had got one that defrosts itself. My next one will!

It was also a good chance to organise it as recently it's been messy.

So here's my nice clean and organized freezer.


I was surprised by all the empty space, I didn't throw anything out so I'm guessing the ice was taking up all that space.

Everything is now organized. Frozen fruit and vegetables on top, ice cream , bread and fries in the middle and meat on the bottom. The very bottom is all fish.

Anyhow just though I would share this with you!

Happy Home Cooking!

Tuesday, July 3, 2012

Monthly Meal Plan - 4th July

I was just reviewing the meal plan and I realized that I hadn't added a recipe for tomorrow and all I put was BBQ. I did this because here in the US tomorrow is a big holiday and hey if you don't BBQ on the 4th July when can you? 


So I don't know what's on the menu here and I would encourage you to do what I'm going to do, talk to my husband and get him to grilling!!! Girl's can grill too but around here it's Ken's job and hey if I get a little break it's all his!!!


If you need an idea you can try my BBQ Chicken Recipe

Happy Home Cooking/Grilling!

Peri peri chicken pasta

The last time I made Peri Peri chicken I had a lot of leftovers. My only problem was that I make two versions, a milder one for me and the boys and a spicer one for my husband, and the spicer one was the leftovers. So what to do?

As I did the dishes it hit me, use the chicken in a pasta dish. The boys and I love pasta and we could pretty much eat all the time. So I saved the chicken without the sauce to stop it from being too spicy. I chopped it up into bite size pieces, added a few other ingredients and voila a yummy quick lunch.

Peri Peri Chicken Pasta


Ingredients:

Leftover chicken from Peri Peri chicken (I used 3 boneless, skinless thighs) cut into pieces
Penne pasta, cooked according to package directions
2 Tablespoons butter
1/2 cup sliced mushrooms
1 clove garlic
1/2 cup chicken stock
2 Tablespoons flour
1 cup of heavy/double cream

Directions:

1. Cook pasta according to package directions.
2. While pasta is cooking, melt butter in a skillet. Add mushrooms and garlic and saute for 3 - 5 minutes. 
3. In a measuring jug add chicken stock and flour, whisk to combine. Add to skillet and stir for a minute.
4. Add the heavy cream and stir to combine. Taste to see if any additional seasoning is needed.
5. Add chicken and pasta and mix. 
6. Serve and sprinkle with scallions and Parmesan cheese.

Happy Home Cooking!


Monday, July 2, 2012

Country Fried Steak

I was introduced to Country Fried Steak back when I first moved to Louisiana. Its true southern cooking at its finest.

I make my gravy separate and before I cook the steaks. My reasons are firstly I like my steaks hot and crispy so having the gravy ready helps. Secondly I don't like the fried oily taste of making the gravy using the oil I fried the steaks. You can do this but like I said for me it's convenience and taste preference.

Cube steak is round steak or top sirloin that has been put through an electrical tenderizer to tenderize it and give it texture. It can also be done with a hand meat tenderizer and help relieve some stress with some good old fashioned beating! It's a fairly cheap cut of meat so great for the budget.

Country Fried Steak


Ingredients:

1/2 stick / 2oz butter
1 cup all-purpose flour plus 1 1/2 tablespoons
1/2 cup finely minced yellow onion
3 tsp Tony's seasoning or other Cajun seasoning
1 large egg
2 - 3 cups milk, as needed
Four 6 - 8 oz cube steaks
Salt and pepper
1/2 cup vegetable oil

Directions:

1. Make the gravy. Melt the butter in a saucepan. Add 1 1/2 tablespoons of flour to pan and cook, whisking constantly, for 1 minute. Add the onion and cook, stirring often, until softened, about 3 minutes.
2. Whisk in 1 1/2 cups of the milk, 1 tsp of Tonys seasoning, 1/4 tsp salt and 1/2 tsp black pepper.
3. Bring the gravy to a boil, reduce the heat to medium-low and simmer for 5 - 6 minutes, until the sauce has thickened and there is no raw flour taste. Add additional milk as necessary to achieve the desired consistency.
4. To cook steaks. Combine 1 cup flour with 1 tsp of Tonys seasoning in a shallow bowl. Whisk the egg, 1/2 cup milk and 1 tsp of Tony's in another shallow bowl.
5. Season the steaks with salt and pepper. Dredge the meat in the seasoned flour, then dip in the egg wash, letting the excess drip off, and then dredge in the flour again. Set the steaks aside in a plate.
6. Add 1/2 cup vegetable oil to a sauté pan and heat over medium-high heat until it is hot but not smoking. Carefully add the steaks and fry until golden, about 3 - 5 minutes per side. Transfer to paper towel to drain.
7. Serve the steaks with the hot gravy, mashed potatoes and vegetables.

Happy home cooking!

Sunday, July 1, 2012

July Meal Plan

Woo hoo!!! The July Meal Plan is here! Sorry I didn't get it posted before today but hey order pizza tonight!!!

For  complete details of the meals go to the Meal Plan page

I know there are a few recipes I still need to add and I will have them up in the next few days. I am hoping August I can work out the shopping list for you too!!!!
Happy Home Cooking!!!

Friday, June 29, 2012

Chicken Pot Pie

I'm not a huge fan of chicken pot pie. I love the filling and I love the pastry but I don't like them together, what can I say I'm a little strange. However my husband loves it, together! Plus this is one of those dishes that freezes really well. I have in the past made several pies and stuck them in the freezer making the next month really easy!

In the pictures shown there are no mushrooms in the pie because my husband hates mushrooms. I love them and could happily eat a mushroom pie, hmm, interesting idea!!! So if you are wondering why they are in the recipe but not in the pictures that is the answer.


Chicken Pot Pie

Ingredients:

Filling:
1 (3.5lb) whole chicken
5 cups water
2 celery stalk tops with leaves
1 1/4 tsp salt
1/4 tsp pepper
3 Tablespoons/ 1.5 oz butter
3 scallions, sliced
2 large celery ribs, chopped
1/2 cup sliced mushrooms
1/2 cup all-purpose flour
3 carrots, diced and cooked
1 tsp salt
1/4 tsp pepper
1/8 tsp dried thyme
1/4 cup heavy/double cream

Pie Crust:
2 cups flour
1/2 tsp salt
1/2 tsp baking powder
10 Tablespoons/ oz butter, cold and cubed
5 Tablespoons water


Directions:

To make the pie crust:
1. Mix the dry ingredients.
2. Add half the butter to the flour mix and place the other half in the freezer. Bear with me! Rub the butter into the flour mixture with your finger tips, until it is the size of breadcrumbs. You can use a pastry cutter.
3. Add the remaining butter and continue to rub it in until it is the size of small peas. Try to make sure that the butter stays cold.


4.Sprinkle the water into the flour, one tablespoon at a time, stirring with a fork. It should stick together but still look dry.


5. Form into a disk and wrap with cling wrap and place in the refrigerator for at least an hour but ideally overnight.


6. Roll out pastry on a floured surface until larger than the pie dish. Gently place the pastry in the dish and push down to fill it. Trim the edges.


7. Roll out a second piece of pastry for the topping crust. Again just a little bigger than needed.

To make Filling:
1. Add chicken, 5 cups water, 2 celery stalk tops with leaves, salt and pepper in a large Dutch oven. Bring to the boil. Reduce heat and simmer mixture 1 1/2 hours or until chicken is done.
2. Remove chicken, reserving 3 1/2 cups broth in Dutch oven; discard celery tops. Let chicken cool; skin, bone and cut into bite-size pieces.
3. Melt butter in skillet. Saute green onions, chopped celery and mushrooms in hot drippings in skillet over medium heat for 5 minutes or until tender.


4. Gradually whisk in flour until blended.


5. Gradually add reserved broth; cook whisking constantly, for 3 minutes or until thickened and bubbly.


6. Stir in chicken, carrots, salt, pepper, thyme and cream.


7. Spoon mixture into prepared pie dishes. Brush the edge with water. Place the second piece of pastry on top. 
8. Using a fork, crimp the edges of the pie to seal the crust together.
9. Brush the top of the pie with egg white and cut a vent in the top.
10. Bake at 450 degrees F for 25 minutes or until golden and bubbly.

Happy Home Cooking!

Thursday, June 28, 2012

Strawberry oatmeal bars

It's very rare that I see a recipe on the food network that I just have to make that day but Saturday was one of those days. I love the Pioneer Woman, she lives my dream life, a ranchers wife. Now I have my cowboy but we just need our ranch, one of these days!

Anyhow Bree is a woman after my own heart. She's not afraid of real ingredients. Saturday morning she had a recipe for Strawberry oatmeal bars. I didn't even get to see the whole segment but I was sold.

So I gave them a go that afternoon. Man can you say G. O. O. D. Good!!! They are like a yummy oatmeal cookie with delicious strawberry jam! Hey oatmeal is good for you!

I have to say I was a little disappointed in the recipe instructions on the food network website. Bree's recipes are normally so well written. I was glad I pulled the video up in my phone because there were a lot of details missing on the recipe. If you want to see the original recipe here is the link. In the video she said she put 2 sticks of butter, I went with the 1 3/4 sticks. I really don't know if it needs more or not. it was very crumbly so maybe the extra 1/4 stick would help with that. I used regular oats, but she used quick cook. I love oats so using the regular was fine with me.

So I decided to fill in the gaps. Oh and if like me you can't wait for them to cool they are delicious right out of the oven! They keep well in an airtight container.

Strawberry Oatmeal Bars


Ingredients:

1 3/4 sticks butter, cut into pieces
1 1/2 cups all-purpose flour
1 1/2 cups oats, quick cook or regular
1 cup packed brown sugar
1 tsp baking powder
1/2 tsp salt
12 oz jar strawberry preserves

Directions:

1. Preheat oven to 350 degrees F. Butter a 9 by 13 inch rectangular pan. I used a glass pyrex one.
2. Add the flour, oats, brown sugar, baking powder and salt to a bowl and mix to combine.
3. Add butter to the bowl and rub into the flour mixture. You can use a pastry cutter too.
4. Press half the oat mixture into the prepared pan.
5. Spread with the strawberry preserves.
6. Sprinkle the other half of the oat mixture over the top and gently pat down.
7. Bake until light brown, 30 - 40 minutes.
8. Once it has cooled, but into squares and store in an airtight container.

WARNING: If you eat it directly out of the oven, preserve might be hot, try not to burn yourself!!!! It's worth the risk.

Happy Home Cooking!

Saturday, June 23, 2012

Sorry!

Sorry I've been missing this week. I consider myself really blessed that I don't have to work outside the home and can be with my boys every day. However I'm not just a house-wife, homemaker, stay at home mom, or whatever this weeks politically correct name for it is. My husband runs his own businesses and well I'm his secretary, book keeper, office manager, general slave, lol! This week we have been very focused on the business. 

I have to say that I have a new found respect for women that work outside the home and the task you have. I have the option of doing a load of laundry in between phone calls or making the bed after I update a spreadsheet. To think of doing my work and then having to come home and take care of the laundry, the housework and the cooking is overwhelming. I can see why take-out or easy meals helps in that process.

There is a downside to my situation, I never get to officially clock out or leave work. It's always here and multitasking isn't always the easiest thing for me. But when I'm feeling stressed I get to have a hug from my boys and remember why I'm doing it all.

Anyhow I will be trying real hard to get caught up. And hey anyone else wondering where June went to? So July's meal plan will be up in the next week!!!!

Hope you have a good weekend.

Happy Home Cooking!

Tuesday, June 12, 2012

Home Made Blue Cheese Dressing

This dressing the perfect accompaniment to chicken wings. It is also delicious as a salad dressing or dip.

The longer you allow it to sit in the refrigerator the better the taste. It will keep in the refrigerator for a week.

Home Made Blue Cheese Dressing


Ingredients:

1 cup crumbled blue cheese
1/4 cup sour cream
1/4 cup mayonnaise
1/2 cup buttermilk
1 tsp fresh lemon juice
1 clove of garlic minced
Freshly ground black pepper

Directions:

Combine all the ingredients in a small bowl and stir to combine. To make the dressing thicker mash the blue cheese against the side of the bowl and stir it in.

Happy Home Cooking!

Chicken Wings

Chicken wings are one of those dishes that can be an appetizer, party snack or meal. Around here it's wing night once a month.

I have to admit that this is not completely from scratch, I do cheat and use bottled wing sauce. I simply haven't gone all the way and tried. I really want to because everytime I find a sauce I like the store stops carrying that brand.

So talking about sauces when I first made this I used Emeril's Hot Wing sauce. It's a really delicious sauce and wonderfully seasoned, hey it's Emeril! The only problem is I can't seem to find it at any of the local grocery stores. You can order it directly from his website or you can find it on Amazon.

I've tried a few others that I found at the grocery store but currently my favourite is Hooters sauce. I have always heard that Hooters has the best wings but I was sceptical because well what is Hooters really renowned for? Cute girls in skimpy shorts.

About a year ago the CBS show Undercover Boss was about Hooters. I was kinda shocked that the owner and CEO thought of Hooters as a family restaurant. Well after trying the wing sauce with my wings I decided I would have to give it a go. On Mother's Day they were offering free wings for all mothers. I told my husband that's where I wanted to go.

Well yes the uniforms are skimpy and the waitresses are all beautiful girls. But I have to say it was a very pleasant experience and the food was delicious!!! Ok so here is it, officially Hooters I apologise for my mis-judgement!

I do hope to give homemade wing sauce a go. Then I could control the spice level. But that is for a later date. Also if spicy isn't your thing then drizzle the wings with BBQ sauce.

The Blue Cheese Dressing is a must and so delicious. It doesn't last long around here. The further in advance you make it the better the taste. Home Made Blue Cheese Dressing Recipe.

I love adding baby carrots and celery to the plate and recently I started using baby sweet peppers. They are like mini bell peppers and so yummy. Plus the veggies even out the fried wings and fries!

Buffalo-style Chicken Wings


Ingredients:

20 whole chicken wings
1 cup all purpose flour
1 tsp salt
1 tsp freshly ground black pepper
1 tsp cayenne pepper
1/2 tsp garlic powder
Vegetable oil, for frying
2 Tablespoons butter, softened
1 bottle of wing sauce
Baby carrots or 8 large carrots cut into sticks
8 celery ribs, cut into sticks
Baby sweet peppers
Seasoned fries

Directions:

1. Separate the chicken wings into drumettes and wings, discarding the wing tip joint. Place chicken wings and drumettes into a large ziplock bag.
2. In a small bowl, combine flour, salt, pepper, cayenne pepper and garlic powder. Add the seasoned flour tithe plastic bag and toss to coat well.
3. Pour the chicken wings and excess flour onto a baking sheet and spread evenly. Allow the chicken to sit on the floured baking sheet to dry out for about an hour.
4. Preheat deep fryer or a large pot filled halfway with vegetable oil to 350 degrees F.
5. Add the chicken to hot oil and fry until cooked through and crispy, about 10 - 13 minutes.
6. In a large bowl add the butter. Place the wings in the bowl and drizzle with the wing sauce. Toss to coat well. Serve hot with the fries, vegetables and Blue Cheese Dressing on the side.


Happy Home Cooking!

Monday, June 11, 2012

Home-made Tortillas

Ok so I'm going to add a new label and page to the blog Home Cooking Mama Pro. It's going to be for those recipes that just push you past the level of excellence. The recipes that, yes you could go to the store and buy pre-made but, you choose to make yourself.

Home made tortillas definitely qualify. On most shopping trips I have always just picked up a pack. Then one day I saw a recipe and thought why not give it a good. Trust me, I am adding a warning, it will be very difficult to enjoy a store bought tortilla after trying these!

Now the original recipe called for lard. Normally I am not afraid of things like butter and lard but I didn't have any and didn't know if the taste was something I would like. So I just added more shortening. If you are in the UK you can use Trex, Flora White or Cookeen. In the US I used Crisco. And of course you can just use lard.

They really don't take long to make and keep well for a few days in the fridge or can be frozen for a month, but defrost completely before eating. I've made them with fajitas recently and they are simply delicious and make the tortillas taste even better.


Homemade Flour Tortillas


Ingredients:

2 3/4 cups (12 1/2 ozs) unbleached all-purpose flour
1 teaspoon baking powder
3/4 teaspoon kosher salt
5 Tablespoons (2 1/2 ozs) vegetable shortening or substitute equal parts shortening and lard
3/4 cup very warm water

Directions:

1. In a bowl, using a whisk, combine the flour, baking powder and salt. 
2. Add the shortening (and/or lard) and rub into the flour mixture until well incorporated.
3. Gradually mix in the water until dough comes together. It should be a medium-stiff consistency, not as soft as a bread dough but not firm either. Add addition water if needed a Tablespoon at a time.
4. Turn the dough out onto a floured surface and knead until smooth.
5. Divide the dough into 12 portions and roll each into a ball. Set the balls on a plate, cover with plastic wrap, and let rest for at least 30 minutes.
6. Flatten the ball of dough, flour it, then roll forward and backward across it once. Rotate a sixth of a turn and roll forward and back again; continue rolling and turning until you reach the desired circle size. Roll all of them before going to the next step.
7. Heat an ungreased griddle or cast-iron skillet over medium to medium high heat.
8. Lay the tortilla on the hot skillet, there may be a little sizzle noise and you see bubbling across the surface.
9. After 45 seconds or so, when there are light brown marks on the bottom, flip it over and cook for another 30 - 45 seconds until the other side is slightly browned. Be careful not to leave it too long or it will become crispy.


10. Remove from the skillet and place on a dry cloth. Repeat the process with the remaining tortillas and stack them one on top of the other on the cloth. 

Happy Home Cooking Pro style!!!

Grilled Pineapple & Chicken Quesadilla

One of the first things I realised when I moved to Louisiana is that they love their Mexican food. Apart from faijitas I wasn't the biggest fan until I got pregnant with my youngest. Then I seemed to want it all the time. So I have a new found appreciation of it, although there are still some restaurants we go to where it just looks like a puréed mess on a plate.

It is interesting when you start to look at different cuisines and how each kind have their own version of similar dishes. Take Cajun Jambalaya, very similar to Chinese fried rice or Italian
Risotto or Spanish paella. All very similar basic ingredients with a unique blend of spices to that region.

Well quesadillas to me are like a grilled sandwich only instead of bread you use tortillas. Now to jump to the pizza aisle, two of my favorite pizzas are BBQ chicken and Hawaiian. So when I was surfing Pinterest I found this recipe. Grilled pineapple and chicken quesadillas. Another genius idea!

So I figured I would give it a go. I believe The Pioneer Woman is the original creator of this recipe but I found it on The Girl Who Ate Everything blog. (by the way love her blog name and her blog!)

Now if you want to take it to the ultimate Home Cooking Diva level you could make your own tortillas. Trust me they are so easy. Plus I have to say its like tasting the difference from fresh baked bread and a store loaf that's been sitting on the shelf a few days. If you want to give them a try here is the recipe for Home Made Tortillas

I used my panini press to grill the pineapple and chicken and then finished it off on the stove on a skillet. I would have used the press for this but it wasn't big enough and I didn't fancy cleaning up the mess. Although I do know they have several Quesadilla makers available at affordable prices. Think I may add it to my wish list as I love quesadillas!

Also the original recipe called for toasting the tortillas before assembling them. I cut this step out because I like a less crispy quesadilla.

This makes a great lunch or snack food. It's also a great way to use up any leftover BBQ chicken, we always seem to have some. You could even throw the pineapple on the grill and then stick it in the refrigerator and it will really be a quick lunch.

Grilled Pineapple and Chicken Quesadillas


Ingredients:

8 (10 inch) flour tortillas
Butter
1/2 pineapple cut into quarter section
2 boneless chicken breast, pounded thin or butterflied
Tony's creole seasoning or other Cajun seasoning
2 cups shredded Colby Jack cheese
3 Tablespoons of BBQ sauce

Directions:

1. To grill pineapple: place wedges on panini press and close lid and grill. You can also cut into wedges, stick on skewers, and grill over low heat either on a grill, grill pan or skillet. Cut into slices and set aside.
2. To grill chicken: season with the Tony's to taste or just use salt and pepper if you don't want the spice. Place on the panini press and close lid and grill until done. I didn't clean the press after the pineapple because I was cooking the chicken straight away and pineapple juices added a little bonus to the chicken! When the chicken is done brush with the BBQ sauce and shred.


3. To assemble: take four tortillas and spread evenly with cheese, chicken and pineapple. Pour a little extra BBQ sauce over. Place the remaining four tortillas on top.
4. Melt a little butter in a skillet and add each quesadilla to the skillet. Cook until the bottom tortilla is slightly browned and then flip and cook on the other side until the cheese has melted
5. Cut each quesadilla into six wedges. Serve with sour cream and/or BBQ sauce.

Happy Home Cooking!