Tuesday, June 12, 2012

Home Made Blue Cheese Dressing

This dressing the perfect accompaniment to chicken wings. It is also delicious as a salad dressing or dip.

The longer you allow it to sit in the refrigerator the better the taste. It will keep in the refrigerator for a week.

Home Made Blue Cheese Dressing


Ingredients:

1 cup crumbled blue cheese
1/4 cup sour cream
1/4 cup mayonnaise
1/2 cup buttermilk
1 tsp fresh lemon juice
1 clove of garlic minced
Freshly ground black pepper

Directions:

Combine all the ingredients in a small bowl and stir to combine. To make the dressing thicker mash the blue cheese against the side of the bowl and stir it in.

Happy Home Cooking!

Chicken Wings

Chicken wings are one of those dishes that can be an appetizer, party snack or meal. Around here it's wing night once a month.

I have to admit that this is not completely from scratch, I do cheat and use bottled wing sauce. I simply haven't gone all the way and tried. I really want to because everytime I find a sauce I like the store stops carrying that brand.

So talking about sauces when I first made this I used Emeril's Hot Wing sauce. It's a really delicious sauce and wonderfully seasoned, hey it's Emeril! The only problem is I can't seem to find it at any of the local grocery stores. You can order it directly from his website or you can find it on Amazon.

I've tried a few others that I found at the grocery store but currently my favourite is Hooters sauce. I have always heard that Hooters has the best wings but I was sceptical because well what is Hooters really renowned for? Cute girls in skimpy shorts.

About a year ago the CBS show Undercover Boss was about Hooters. I was kinda shocked that the owner and CEO thought of Hooters as a family restaurant. Well after trying the wing sauce with my wings I decided I would have to give it a go. On Mother's Day they were offering free wings for all mothers. I told my husband that's where I wanted to go.

Well yes the uniforms are skimpy and the waitresses are all beautiful girls. But I have to say it was a very pleasant experience and the food was delicious!!! Ok so here is it, officially Hooters I apologise for my mis-judgement!

I do hope to give homemade wing sauce a go. Then I could control the spice level. But that is for a later date. Also if spicy isn't your thing then drizzle the wings with BBQ sauce.

The Blue Cheese Dressing is a must and so delicious. It doesn't last long around here. The further in advance you make it the better the taste. Home Made Blue Cheese Dressing Recipe.

I love adding baby carrots and celery to the plate and recently I started using baby sweet peppers. They are like mini bell peppers and so yummy. Plus the veggies even out the fried wings and fries!

Buffalo-style Chicken Wings


Ingredients:

20 whole chicken wings
1 cup all purpose flour
1 tsp salt
1 tsp freshly ground black pepper
1 tsp cayenne pepper
1/2 tsp garlic powder
Vegetable oil, for frying
2 Tablespoons butter, softened
1 bottle of wing sauce
Baby carrots or 8 large carrots cut into sticks
8 celery ribs, cut into sticks
Baby sweet peppers
Seasoned fries

Directions:

1. Separate the chicken wings into drumettes and wings, discarding the wing tip joint. Place chicken wings and drumettes into a large ziplock bag.
2. In a small bowl, combine flour, salt, pepper, cayenne pepper and garlic powder. Add the seasoned flour tithe plastic bag and toss to coat well.
3. Pour the chicken wings and excess flour onto a baking sheet and spread evenly. Allow the chicken to sit on the floured baking sheet to dry out for about an hour.
4. Preheat deep fryer or a large pot filled halfway with vegetable oil to 350 degrees F.
5. Add the chicken to hot oil and fry until cooked through and crispy, about 10 - 13 minutes.
6. In a large bowl add the butter. Place the wings in the bowl and drizzle with the wing sauce. Toss to coat well. Serve hot with the fries, vegetables and Blue Cheese Dressing on the side.


Happy Home Cooking!

Monday, June 11, 2012

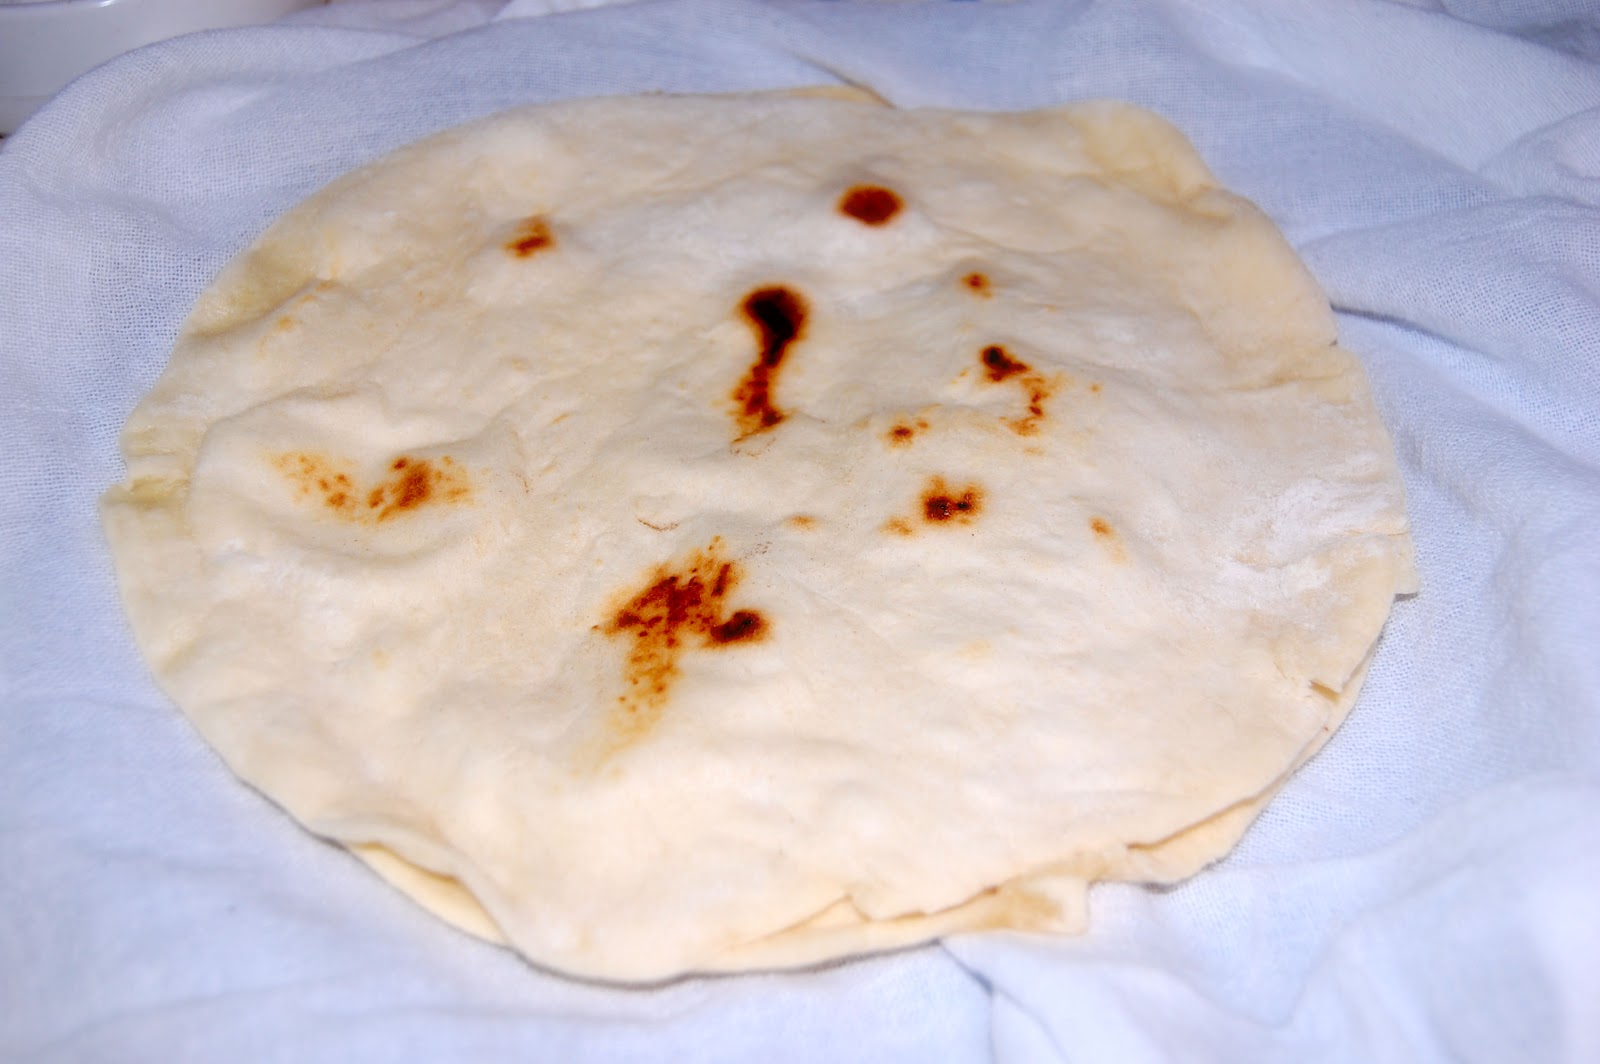
Home-made Tortillas

Ok so I'm going to add a new label and page to the blog Home Cooking Mama Pro. It's going to be for those recipes that just push you past the level of excellence. The recipes that, yes you could go to the store and buy pre-made but, you choose to make yourself.

Home made tortillas definitely qualify. On most shopping trips I have always just picked up a pack. Then one day I saw a recipe and thought why not give it a good. Trust me, I am adding a warning, it will be very difficult to enjoy a store bought tortilla after trying these!

Now the original recipe called for lard. Normally I am not afraid of things like butter and lard but I didn't have any and didn't know if the taste was something I would like. So I just added more shortening. If you are in the UK you can use Trex, Flora White or Cookeen. In the US I used Crisco. And of course you can just use lard.

They really don't take long to make and keep well for a few days in the fridge or can be frozen for a month, but defrost completely before eating. I've made them with fajitas recently and they are simply delicious and make the tortillas taste even better.


Homemade Flour Tortillas


Ingredients:

2 3/4 cups (12 1/2 ozs) unbleached all-purpose flour
1 teaspoon baking powder
3/4 teaspoon kosher salt
5 Tablespoons (2 1/2 ozs) vegetable shortening or substitute equal parts shortening and lard
3/4 cup very warm water

Directions:

1. In a bowl, using a whisk, combine the flour, baking powder and salt. 
2. Add the shortening (and/or lard) and rub into the flour mixture until well incorporated.
3. Gradually mix in the water until dough comes together. It should be a medium-stiff consistency, not as soft as a bread dough but not firm either. Add addition water if needed a Tablespoon at a time.
4. Turn the dough out onto a floured surface and knead until smooth.
5. Divide the dough into 12 portions and roll each into a ball. Set the balls on a plate, cover with plastic wrap, and let rest for at least 30 minutes.
6. Flatten the ball of dough, flour it, then roll forward and backward across it once. Rotate a sixth of a turn and roll forward and back again; continue rolling and turning until you reach the desired circle size. Roll all of them before going to the next step.
7. Heat an ungreased griddle or cast-iron skillet over medium to medium high heat.
8. Lay the tortilla on the hot skillet, there may be a little sizzle noise and you see bubbling across the surface.
9. After 45 seconds or so, when there are light brown marks on the bottom, flip it over and cook for another 30 - 45 seconds until the other side is slightly browned. Be careful not to leave it too long or it will become crispy.


10. Remove from the skillet and place on a dry cloth. Repeat the process with the remaining tortillas and stack them one on top of the other on the cloth. 

Happy Home Cooking Pro style!!!

Grilled Pineapple & Chicken Quesadilla

One of the first things I realised when I moved to Louisiana is that they love their Mexican food. Apart from faijitas I wasn't the biggest fan until I got pregnant with my youngest. Then I seemed to want it all the time. So I have a new found appreciation of it, although there are still some restaurants we go to where it just looks like a puréed mess on a plate.

It is interesting when you start to look at different cuisines and how each kind have their own version of similar dishes. Take Cajun Jambalaya, very similar to Chinese fried rice or Italian
Risotto or Spanish paella. All very similar basic ingredients with a unique blend of spices to that region.

Well quesadillas to me are like a grilled sandwich only instead of bread you use tortillas. Now to jump to the pizza aisle, two of my favorite pizzas are BBQ chicken and Hawaiian. So when I was surfing Pinterest I found this recipe. Grilled pineapple and chicken quesadillas. Another genius idea!

So I figured I would give it a go. I believe The Pioneer Woman is the original creator of this recipe but I found it on The Girl Who Ate Everything blog. (by the way love her blog name and her blog!)

Now if you want to take it to the ultimate Home Cooking Diva level you could make your own tortillas. Trust me they are so easy. Plus I have to say its like tasting the difference from fresh baked bread and a store loaf that's been sitting on the shelf a few days. If you want to give them a try here is the recipe for Home Made Tortillas

I used my panini press to grill the pineapple and chicken and then finished it off on the stove on a skillet. I would have used the press for this but it wasn't big enough and I didn't fancy cleaning up the mess. Although I do know they have several Quesadilla makers available at affordable prices. Think I may add it to my wish list as I love quesadillas!

Also the original recipe called for toasting the tortillas before assembling them. I cut this step out because I like a less crispy quesadilla.

This makes a great lunch or snack food. It's also a great way to use up any leftover BBQ chicken, we always seem to have some. You could even throw the pineapple on the grill and then stick it in the refrigerator and it will really be a quick lunch.

Grilled Pineapple and Chicken Quesadillas


Ingredients:

8 (10 inch) flour tortillas
Butter
1/2 pineapple cut into quarter section
2 boneless chicken breast, pounded thin or butterflied
Tony's creole seasoning or other Cajun seasoning
2 cups shredded Colby Jack cheese
3 Tablespoons of BBQ sauce

Directions:

1. To grill pineapple: place wedges on panini press and close lid and grill. You can also cut into wedges, stick on skewers, and grill over low heat either on a grill, grill pan or skillet. Cut into slices and set aside.
2. To grill chicken: season with the Tony's to taste or just use salt and pepper if you don't want the spice. Place on the panini press and close lid and grill until done. I didn't clean the press after the pineapple because I was cooking the chicken straight away and pineapple juices added a little bonus to the chicken! When the chicken is done brush with the BBQ sauce and shred.


3. To assemble: take four tortillas and spread evenly with cheese, chicken and pineapple. Pour a little extra BBQ sauce over. Place the remaining four tortillas on top.
4. Melt a little butter in a skillet and add each quesadilla to the skillet. Cook until the bottom tortilla is slightly browned and then flip and cook on the other side until the cheese has melted
5. Cut each quesadilla into six wedges. Serve with sour cream and/or BBQ sauce.

Happy Home Cooking!