Showing posts with label From Scratch. Show all posts

Sunday, September 24, 2017

Homemade Bread - Farmhouse White Sandwich

I posted on my facebook yesterday pictures of the bread I was making and a few asked if I would share the recipe, so I figured I would share it on here.

It's been so long since I baked bread or blogged for that matter. I have to say it felt so good to feel that dough in my hands.

I've been looking for a recipe that would hold up to sandwiches when we need a lunch for our homeschool field trips and co-op. The old recipe I used never did well. I haven't tested this one yet but I can already tell it is holding up well. It's a denser bread and has a lovely flavor.

I also love that she has the 3 loaf batch recipe. Let's face it, no one has time to bake fresh bread every morning. Although if you do, please let me know, because somehow there has to be a way that doesn't mean the alarm is going off at some ungodly hour before even King, my rooster, wakes up!


I have shared below how I followed the recipe and the tweaks I made. I didn't need as much flour as the original recipe called for. I also need longer proofing time. The key to bread making is PATIENCE! Also my recipe is only for 1 loaf, not the original 3. I baked mine at 360 instead of the 375 because my oven runs a little hotter. 

You can find the original recipe here at Farmgirl Fare. 

For you more visual learner Gather For Bread added a short video on their post of this recipe showing the steps.

Farmhouse White Sandwich Bread (1 loaf)

Ingredients:

1 1/3 cup all-purpose flour
1/2 Tablespoon yeast
2/3 Tablespoon sugar
2/3 Tablespoon melted butter
1 1/3 cup warm milk
1 1/2 cups (roughly) bread flour
1/2 Tablespoon of salt

Directions:

1. Mix together the all-purpose flour, yeast, and sugar. (This could be done in your Kitchen Aid mixer if you don't want the arm workout.)
2. Make a well in the middle of the flour and add the melted butter then then milk.
3. Continue to mix, adding 1/2 cup of bread flour at a time, until you have added around 1 1/2 to 2 cups and have sticky, shaggy dough. 
4. Cover the bowl with a damp tea towel and let it rise for 20 minutes. 
5. Add the salt and 1/2 cup more of bread flour, depending on how sticky or dry it is. 
6. Turn the dough out onto a floured work surface and knead it with floured hands until the dough is soft and smooth, about 10 minutes. If you need to sprinkle with flour, do so. You want a soft dough not a sticky one.
7. I put my dough in a 6-quart container with a lid and marked where the dough was. You want it to double in size. This will depend on the dough temp and the room temperature. It took mine 1 1/2 hours to double. 
8. The dough is ready to shape when you can push a floured finger deep into it and leave an indentation that doesn't spring back.
9. Turn the dough onto a lightly floured work surface and flatten gently with your hands to remove any large air bubbles. 
10. Shape the dough into loaves and place seam side down in a greased and floured loaf pan. I used a 9 inch pan.
11. Cover with a damp tea towel and let them rise for another hour.
12. Bake at 375 for 35 minutes. The loaf should be golden brown and the bottom sound hollow if you table it.
13. Place on a wire rack to cool.
14. Enjoy! 

Thursday, March 14, 2013

Meyer Lemon Pudding


One of my newest obsessions is Pinterest! By far the best addition to the internet ever!!! I actually wondered the other day what I did before it existed. Not only is it a rich source of inspiration for recipes but I've built and decorated about 5 dream homes and I have the most amazing virtual wardrobe, plus an organised home-school lesson plan ideas. 

Anyhow I digress! While doing my daily trip to Pinterest land I saw this beautiful picture of a Meyer lemon pudding. So I just had to make it. With my new found desire to make everything from scratch pudding just seemed like a sure thing. Plus my sweet little hens have been lying well so using eggs didn't seem like a waste.

I have to say that it was wonderful and my sweet boys were addicted. They actually couldn't wait for it cool and we had to taste while it was still warm and it was delicious. To please my picky 5 year old is not easy!!!

So Meyer lemons. I'll be honest I've learnt a lot about them this past weekend. They are a species that originates in China and is supposed to be a cross between a lemon and an orange, strange feeling there's a joke in there somewhere!!!! Anyhow I know that they are a winter harvested fruit and we're kinda in that spring season now. I honestly didn't go looking for them and just did the half lemon/half orange switch which worked well.

One of the things that amazed me when I moved to Louisiana was the ability to grow 'tropical' type fruit. Lets face it Northern Ireland is far from tropical. So I'm thinking a Meyer lemon tree maybe moving into my back yard.


Meyer Lemon Pudding

Ingredients:

¾ cup granulated sugar
¼ cup cornstarch
2 ½ cups whole milk
3 extra large egg yolks, lightly beaten
2 T finely grated Meyer lemon zest (or 1 T lemon zest & 1 T orange zest)
¼ tsp kosher salt
½ cup freshly squeezed Meyer lemon juice (or ¼ cup freshly squeezed lemon juice & ¼ cup freshly squeezed orange juice)
2 T unsalted butter at room temperature

Directions:

1.    In a medium saucepan, whisk together the sugar and cornstarch.
2.    Add the milk, egg yolks, zest and salt and whisk until smooth.
3.    Cook over medium heat, stirring frequently at first and constantly toward the end, until thickened.
4.    Remove the pan from the heat and stir in the citrus juice and butter.
5.    Place a fine mesh sieve over a large bowl and pour the mixture through the strainer.
6.    Divide the mixture into 6 serving dishes and let cool at room temperature.
7.    Refrigerate, loosely covered (tightly covered will trap too much moisture, making a watery pudding) for at least 3 hours and up to 3 days.
8.    Serve chilled by itself or with lightly sweetened whipped cream.


Happy Home Cooking!

Wednesday, March 13, 2013

Homemade Bread!

Well on my journey to stop paying other people to make things that I can make myself (and yes I understand some people have extremely busy lives and can't) I have gone down the homemade bread road. For the last few months I've been experimenting with some recipes to see which one will fit our family. To say I have fallen in love is an understatement. This bread is moist and is still wonderful after 2 days, I don't know about any longer because it only made it that long because I specifically kept some to see. Although we have found that to make sandwiches that won't be eaten right away it doesn't seem to hold up.

I have to admit that I have been a mindless food purchaser and not really paid attention to labels and from time to time I would get a notion to but it was never a long lived thing, convenience seemed to win over. I recently took a look at the store bought bread we have used for years and saw all sorts of weird named ingredients. Now I know that they need it to preserve the bread so it has a shelf life but when you make fresh bread and see how long it lasts its a little scary how well these preservatives work! 

The trick for me is going to be timing and staying on top of the bread supply. Recently I haven't been too good at getting up early so bread for lunch has been a little late. I have horrible time management skills and really need to work on discipling myself and working to a schedule. Some recent changes around here will really go along way to helping me achieve this goal. I think a few more attempts and I will have my timing down perfect for the lunch time loaf of bread.

The original recipe this is adapted from is the Food Networks Alton Brown from Good Eats, Very Basic Bread Recipe. I love his show, well some of it, not the silly parts. I love the way he goes into the science behind cooking. It really is a science when you break it down. It also helps you to understand why you do the things you do at a specific stage in the cooking process. Anyhow I have changed the method Mr Brown used because it required some prepping the night before and I didn't feel the yeast was activating as much as I would have liked. So I got Julia Child's french bread recipe which is delicious. I took some of the method she used and applied it to Alton's recipe. Anyhow the results was amazing. The bread rose better and had a much better shape but still retained the taste.

My ingredients list is simple and this makes it cheaper than a store bought loaf. I love the fact that it is honey not sugar. Yeast needs sugar or honey to do it's thing but I much prefer the ability to use honey instead of sugar because its much less refined.

The shallow pan with hot water in it at the bottom of the oven will help to get a soft crust and keep the bread moist while it cooks. But I cannot impress on you the importance of being careful when you open the oven door, water and hot oven equals lots and lots of hot burning steam, I KNOW!!!!!! Facial like I've never experienced nor care to again!!!!

I've made the bread at night and it's been perfect for sandwiches the next day. Although it didn't seem to hold up for my husband when he made a peanut butter and jelly sandwich in the morning and went to eat it at lunchtime.

By the way this is delicious with the Home Made Butter from January. In fact makes a peasant food like bread and butter feel like a luxury! I'll not even mention how delicious the BLT sandwich is either!!!

So give it a go you never know you could get addicted like me!!!!


Home Made Bread

Ingredients:

1 lb/16 oz bread flour, plus extra for shaping
1 tsp instant rapid rise yeast
2 tsp honey
10 oz of lukewarm water
1/2 tsp salt
2 quart hot water

Directions:

1. Combine yeast, lukewarm water and honey. Let stand for five minutes.
2. Stir together flour and salt in the bowl of a mixer. 
3. Using the dough hook attachment, add the yeast mixture to the bowl.
4. Knead the mixture on low for 2 - 3 minutes until the mixture comes together.
5. Cover the dough in the bowl with a tea towel and allow to rest for 20 minutes.
6. After 20 minutes, knead the dough on medium speed for 5 - 10 minutes. The dough will be sticky but shouldn't be too sticky to handle.
7. Add half of the hot water to a shallow pan and place on the bottom rack of your oven. DO NOT TURN THE OVEN ON.
8. Place the dough in the mixer bowl in the oven on the rack directly above the hot water. Cover and allow to rise until doubled in size, about 1 - 2 hours.
9. Once the dough has risen turn it onto a counter top, lightly dust your hands with flour and press the dough out with your knuckles.
10. Grease the loaf pan with butter and sprinkle with flour.
11. Mold the dough into a shape about the size of the loaf pan and set it inside. Cover and allow to rest for about 30 minutes till 1 hour until it has risen.
12. Turn your oven on to 400 degrees F. Add more water to the shallow pan if it has evaporated. REMEMBER BE EXTREMELY CAREFUL OPENING THE OVEN DOOR FROM THIS POINT ON - STEAM!!!!!
13. Place you bread in the oven and allow to cook for 35 - 40 minutes. Once the bread has reached an internal temperature of 205 to 210 degrees F, remove from oven and place on a cooling rack for 30 minutes. (If you are like me at least give it a few minutes so you don't burn yourself!).

Happy Home Cooking!!!

Friday, January 18, 2013

Beef & Vegetable Soup

Recently I've started making soup at the weekends for lunch. Something comforting about soup in the winter, really any time of year. Anyhow I want to share one of my family's favorite soups, Beef & Vegetable Soup. It's delicious and it's even better the next day!!!!


Beef & Vegetable Soup

Ingredients:

1 1/2 lbs stewing steak
1/4 cup butter
1 cup coarsely chopped onions
1 cup coarsely chopped celery
1 cup coarsely chopped green bell pepper
1 cup slice carrots
1/4 cup minced garlic
8 cups beef stock
1 pint diced tomatoes
8 oz can tomato sauce
6 cubed red potatoes
1 cup corn
1 tin red kidney beans (drained)

Directions:

1. In a stockpot, melt butter over medium-high heat. Sear meat to nice brown coloring then add onions, celery, bell peppers, carrots, and garlic. Saute for 3 - 5 minutes or until vegetables are wilted.
2. Add beef stock, tomatoes and tomato sauce and cook until meat is fork tender, about 2 hours.
3. Add potatoes, corn and beans. Cook an additional 25 minutes.
4. Season to taste using salt and black pepper. Additional beef stock may be added to retain the volume of liquid.

Happy Home Cooking!

Tuesday, January 8, 2013

I made BUTTER!!!

OK before I get starting I have to warn you this post comes with a RANT warning!!!

BUTTER...

I mentioned in the Rice & Gravy recipe post about my love of butter and that I would save the comments well I decided to not wait too long. One of my facebook friends posted about margarine and some interesting facts so I am jumping deeper into the situation.

If I had my way ALL margarine would be BANNED! Please people stop eating it!!!

Lets take a look at the ingredients:

American Margarine: Country Crock
Vegetable Oil Blend: (Liquid Soybean Oil, Partially Hydrogenated soybean oil, Hydrogenated cottonseed oil) Water, Whey, Milk, Salt, Vegetable mono and diglycerides, Soy Lecithin, Potassium Sorbate, Calcium Disodium Edta, Citric Acid, Artificial Flavor, Vitamin A (Palmitate), Beta Carotene (for color)

American Butter: Land O Lakes
Sweet Cream, Salt

So 15 ingredients versus 2!!!!! And two natural ones at that!!! Plus lots of vague mystery items like Artificial flavor which could mean anything. The most alarming ingredient is the Calcium Disodium Edta, which is made using FORMALDEHYDE! 

British Margarine: Flora
Water, Vegetable Oils (seed oils 83%), Buttermilk, Salt (1.4%), Emulsifiers (Mono- and Di-Glycerides of Fatty Acids, Sunflower Lecithin), Flavouring, Preservative (Potassium Sorbate), Citric Acid, Colour (Beta-Carotene), Vitamin A and D

British Butter: Kerry Gold
Milk, salt

So again about 11 ingredients versus 2.

Now I know all the cholesterol arguments and trust me I grew up in a house where Flora was the stable and I hated the taste of the stuff. On my journey over the last few years of looking at what I'm eating, labels have become somewhat interesting to me. I am a recovered Diet Coke addict, and yes I was addicted and yes I think rehab would have helped me kick me, it was that bad!!!! What really stopped me with the Diet Coke was when it came out in the news that Benzene, one of the ingredients, is a component of gasoline. So when I looked at the label and saw the chemistry experiment that is Diet Coke it didn't seem very appetizing anymore. We really don't drink soda anymore in our house and if we do I tend to make it Coke or 7 Up which both seem to have non chemical ingredients. So margarine is that same category for me, a chemistry experiment disguised as food! Let's face it margarine was not created by a culinary genius but by a French Chemist in 1813.

Back to the cholesterol issue, yes we have heart disease but I've heard many people state that the low-fat/non-fat diet has not done a thing to reduce heart disease and in fact since the whole thing began obesity and diabetes have increased astronomically. So really is fat that bad? Is cholesterol in our diet the killer? Have we really looked at the long term effects of a preservative that is made from FORMALDEHYDE? A molecule here and a process change there and some of these 'food' items are one step away from plastic! And if they are preserving the food what are they doing to our bodies? Never mind the fact that they have to add artificial flavorings to all this to make it consumable. 

So in my book a little butter is a much safer risk than a chemistry experiment. It's flavor is natural and before you say anything I use unsalted butter and rarely the salted variety. I was watching an episode of Paula Deen's show and she had the Pioneer Woman, Ree Drummond, on and Ree made the comment that she doesn't count the butter she has in her refrigerator by sticks but by pounds. I had to giggle because I'm the same. Two of my favorite cooks and they are both like me butter fans!!!

So this whole thought process got me thinking about the whole making it myself instead of paying other people to thing and I decided to give it a go. After watching numerous videos on the internet (and there are numerous videos on the subject) I got busy. Thankfully modern technology has made it easier for us than my grandmother and I didn't have to get a butter churner out, although I want to give that a go!!!! My Kitchen Aid mixer is by far one of the best gifts my husband has given me (after our two gorgeous precious sons of course, and my sewing machine)! The whole process was done in less than 10 minutes!!!

Now a quick note of the by-product, buttermilk! I have heard of people drinking a glass of buttermilk as a treat before bed, but the buttermilk I've got at the store never seemed appealing in that way! Well I tried the buttermilk from my experiment and it was delicious!!!! OK now I understand!!!!

So go on, if you have some heavy whipping cream and a mixer give it ago. Trust me you will not be disappointed. I can't wait until the next time I'm in Northern Ireland because the milk over there is a million times more superior to here and I can only imagine how much more delicious that butter will be!!!!!

Oh one last note, care of my husband. The TV show Modern Marvels is a favorite in this house and it just so happened that yesterday butter was the subject. They said that they store butter in containers that you can't see through because light can cause the butter to go rancid quicker. So just a tip for storage, keep an old butter container and use that.

Homemade Butter


Ingredients: 

2 cups of heavy cream (at room temperature)
Ice water
Pinch of salt

Directions:

1. With the whisk attachment on the mixer add the cream to the mixer and set to high (or whatever level is going fast but not sending cream flying everywhere!!).
2. Sit back and wait, all of a sudden the butter and the milk will separate, if you do walk away you will hear a sloshing noise all of a sudden.
3. When they separate switch the whisk attachment for the paddle, it will make life easier. Turn the mixer back on for a few minutes more.
4. Carefully drain the buttermilk into a jar and set aside.


5. Add a little ice water (but make sure not to get ice in it!!) to the butter and start the mixer again. You are sort of washing the butter to get the last of the buttermilk out. Pour out the milky water and discard.  Repeat this process until the water stays clear.
6. Add a pinch of salt and mix one last time and store in the refrigerator!


Happy Home Cooking!!!!

Monday, January 7, 2013

Rice & Gravy

Ok rice and gravy is probably the most unimaginative name for this one but over the past 10 years when my hubby asked what's for dinner that's what I told him and he knew what I meant.


I use round steaks and cook them in a gravy. And yes, you guessed it, I serve it with rice! Although the Northern Irish comes out in me and I have to have potatoes of any form with it! Recently I've been on a roast potatoes kick, although honestly they have always been one of my favorite ways to eat potatoes. There is nothing more glorious than a perfectly crisp roast potato, with it yummy fluffy inside, smothered in gravy! YUMMY!!! At this time I'll take a moment to wipe the drool from my face and compose myself!

OK back to meal in hand, Rice and gravy as I call it. This is a little more involve meal and requires starting early (although if you went to play in Pinterest land and lost track of time like I do frequently, a hotter stove and constant attention can reduce the time.)

This is also an amazing dish for the crock pot. Left alone all day to cook makes this dish perfect and I need to use my crockpot more!

I use butter for my roux with this one, oil will work too but I prefer the taste of butter and the creamy feel it adds. I'm sure somehow I'm a close relative of Paula Deen! However the butter issue will be a for another day and post, trust me I have strong opinions there!!

As the title suggests you can serve the steaks and gravy over rice but really any side dish works great with this, roast potatoes, mashed potatoes, mac n cheese, wild rice...and the list goes on. We have rice and potatoes the perfect Cajun/Irish mix! I always do some sort of vegetable too, again whatever works for your family.


Oh and one other note, I'm crazy about garlic, so I add a nice amount of it. You can omit it or reduce it to your taste.

Rice & Gravy

4 eye of round steaks, trimmed of fat
1 onion, finely chopped
4 garlic cloves, minced
Salt and pepper
4 tablespoons unsalted butter
1/3 cup flour
4 cups beef stock
1 teaspoon kitchen bouquet
Tony's seasoning to taste

1. Season steaks with salt and pepper (or Tony's if you are me!).
2. Add onion and garlic to skillet. Place the steaks on top and cook until the steaks turn brown. A little debris at the bottom of the skillet is OK, if it gets too bad add a little water.
3. When steaks are brown remove to a plate and set aside.
4. Add enough water to the skillet to deglaze it and pour liquid into a bowl. You could use wine although I've never tried.
5. Melt 4 tablespoons of butter in skillet and add flour. Stir constantly for 5 minutes.
6. Using a whisk, stir in the beef stock (it's always a good idea to have the beef stock warm). When nice and smooth add kitchen bouquet and seasoning.
At this stage you can add it to the crockpot and let it do its thing all day.
7. For the stove top method, Cook on low for about 2 hours stirring regularly to prevent burning. Trust me on this one!!!!

Happy Home Cooking!

Tuesday, October 23, 2012

Made From Scratch Beef Fajitas

I am so proud of myself. One of my aims has been to completely replace processed food in our diet and find a way to make our favorites from scratch. Well for the longest time Beef Fajitas were my quick and easy open a packet go to meal, the seasoning was prepackaged, the tortillas were prepackaged. Recently for dinner I made Beef Fajitas from scratch, the seasoning was my own and the tortillas were completely homemade.

I cannot begin to tell you how delicious and superior this seasoning is to the McCormick pack. Now I'm not criticizing McCormick, they have been a faithful friend in my kitchen. However I have become more conscious of the label on food. McCromick's Fajitas Mix ingredients are: Spices (including Cumin, chili pepper, and oregano), corn maltodextrin, onion, onion salt, corn syrup solids, garlic, citric acid, caramel color, lime juice solids, modified corn starch and natural flavors. Now in the grand scheme of things that doesn't sound too bad and maltodextrin isn't the worse additive as it's actually from food not chemicals. However I know that glucose based items aren't usually that good for blood sugar. I do wonder why 'caramel color' is required!

I've posted the recipe for the tortillas before and once you have made them from scratch and see how easy they are and how awesome they taste you will have a hard time buy them at the store. 

So here is the recipe for Made From Scratch Beef Fajitas. Trust me these are the best fajitas, my father-in-law even loves them and he's a really picky eater!!!!


Beef Fajitas


 Seasoning
2 tsp chili powder
1 tsp salt
1 tsp paprika
1 tsp sugar
½ tsp onion powder
½ tsp garlic powder
¼ tsp cayenne pepper
¼ tsp oregano
¼ tsp cumin

Tortillas
2 ¾ cups (about 12½  oz) unbleached all-purpose flour
1 tsp baking powder
¾ tsp kosher salt
5 T (2 ½ oz) vegetable shortening
¾ cup very warm water

Fajitas 
1 lb sirloin beef
2 T vegetable oil
1 red bell pepper, cut into strips
1 green bell pepper, cut into strips
1 yellow bell pepper, cut into strips
1 red onion, cut into strips


Directions:

1. Mix all the seasoning ingredients together.


2. Cut up the beef into strips and place in a bowl. Add the seasoning and mix to completely cover.


3. Let the meat marinate in the fridge for at least an hour. You can also freeze the meat marinated.
4. To make the tortillas: in a bowl, using a whisk, combine the flour, baking powder and salt. Add the shortening (and/or lard) and rub into the flour mixture until well incorporated.
5. Gradually mix in the water until the dough comes together. It should be a medium-stiff consistency, not a soft as bread dough but not firm either. Add additional water if needed a Tablespoon at a time.
6. Turn the dough out onto a floured surface and knead until smooth.


7. Divide the dough into 12 portions and roll each into a ball. Set the balls on a plate, cover with plastic wrap, and let rest for at least 30 minutes.


8. Flatten the ball of dough, flour it, and then roll forward and backward across it once. rotate a sixth of a turn and roll forward and back again; continue rolling and turning until you reach the desired circle size. Roll all of them before going to the next step. I've found that adding a little extra flour between them helps to stop them sticking together.
9. Heat 2 tablespoons of vegetable oil in a cast iron skillet. Add the beef and cook, stirring frequently.
10. When the beef has browned add the bell peppers and red onion and continue to cook until they are done. Don't forget to stir it!


11. While the beef is cooking, cook the tortillas. Heat an ungreased griddle or cast-iron skillet over medium to medium high heat.
12. Lay the tortillas on the hot skillet, there may be a little sizzle noise and you will see bubbling across the surface.


13. After 45 seconds or so, when there are light brown marks on the bottom, flip it over and cook for another 30 - 45 seconds until the other side is slightly browned. Be careful not to leave it too long or it will become crispy. Remove from the skillet and place on a dry cloth. Repeat the process with the remaining tortillas and stack them one on top of the other on the cloth.


14. Serve immediately and with all the additions you like, cheese, sour cream, salsa, whatever takes your fancy.


Happy Home Cooking!!!


Monday, October 22, 2012

Home made tacos

Sorry for my absence but life gets so hectic sometimes.

But I'm back!!! And my mission to remove the processed food from my family's diet continues.

Today Tacos. For years I've used the old El Paso kits and seasoning. Honestly there was nothing too wrong with that, tacos were a quick easy meal! Then I started making the fajitas from scratch and they were delicious. Then I made the prepackaged tacos and my husband didn't really care for them anymore, it seems that he has been ruined.

So I decided it was time to make my own taco seasoning. After all this is not a move that means I will be cooking for twenty more hours. I got my seasonings out, mixed them in the bowl and ta da no more pre-packaged seasoning. I reduced the amount of cayenne pepper because it had a little too much kick to it, although my husband liked that.

I adapted my recipe from Alton Brown's All American Beef Taco. I love the show Good Eats because he really strips recipes to their core and explains why and how the processes are the way they are. We recently changed cable companies and now get the Cooking Channel. Can I say how much I am enjoying it!

I have to admit that I used store bought taco shells, we all have to cheat a little right. But I do plan to figure out how to make them. Mr Brown did say how to make them into shells by buying corn tortillas but I decided to save myself that step this time.

Oh one quick note, you can go ahead and make up a jar of the seasoning and it will keep for a month in an airtight container. Although it takes such little time to mix it that you don't need to, but it could be a help, if time is short, to have some ready to use. As for cost well initially buying the spices might be more than a pack of seasoning but they will make many of a seasoning mix. I already had all the spices in my cupboard so it was simply a case of reaching in the cupboard.

Home made Tacos

Seasoning
2 Tablespoons chili powder
1 Tablespoon ground cumin
2 teaspoons cornstarch
2 teaspoons kosher salt
1 1/2 teaspoons smoked paprika
1 teaspoon ground coriander
1/4 teaspoon cayenne pepper

Put all of the ingredients in a small bowl. Using a hand whisk mix to combine. Store in an airtight container for up to a month.

Tacos
1 medium onion, finely chopped
2 cloves garlic, minced
1.5 lbs lean ground meat (mince meat)
1 recipe of seasoning mix
1 cup low sodium beef stock
Taco shells, lettuce, tomato, cheese and other favourite toppings as desired

1. Place ground meat, garlic and onions in a skillet and cook until browned, making sure to stir to break up ground meat.
2. Add seasoning mix and beef broth.
3. Bring to a simmer and cook, uncovered, until sauce is slightly thickened.
4. Heat taco shells according to package instructions.
5. Assemble as desired!

Happy Home Cooking!

Monday, June 11, 2012

Home-made Tortillas

Ok so I'm going to add a new label and page to the blog Home Cooking Mama Pro. It's going to be for those recipes that just push you past the level of excellence. The recipes that, yes you could go to the store and buy pre-made but, you choose to make yourself.

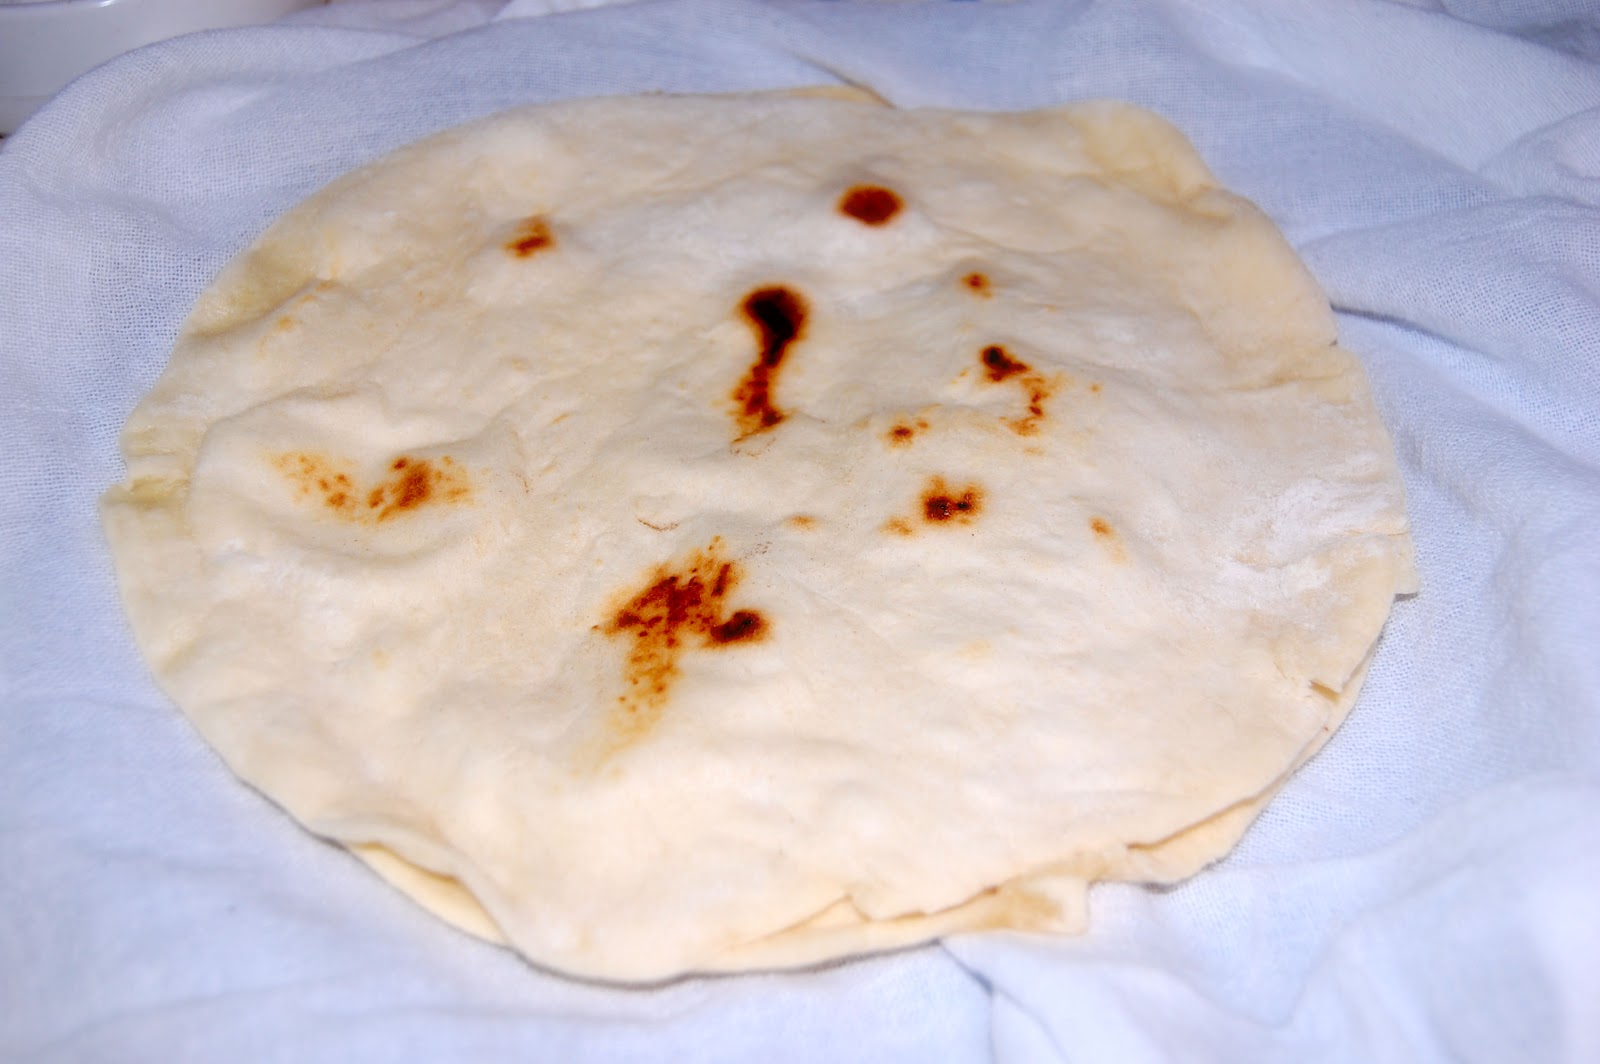
Home made tortillas definitely qualify. On most shopping trips I have always just picked up a pack. Then one day I saw a recipe and thought why not give it a good. Trust me, I am adding a warning, it will be very difficult to enjoy a store bought tortilla after trying these!

Now the original recipe called for lard. Normally I am not afraid of things like butter and lard but I didn't have any and didn't know if the taste was something I would like. So I just added more shortening. If you are in the UK you can use Trex, Flora White or Cookeen. In the US I used Crisco. And of course you can just use lard.

They really don't take long to make and keep well for a few days in the fridge or can be frozen for a month, but defrost completely before eating. I've made them with fajitas recently and they are simply delicious and make the tortillas taste even better.


Homemade Flour Tortillas


Ingredients:

2 3/4 cups (12 1/2 ozs) unbleached all-purpose flour
1 teaspoon baking powder
3/4 teaspoon kosher salt
5 Tablespoons (2 1/2 ozs) vegetable shortening or substitute equal parts shortening and lard
3/4 cup very warm water

Directions:

1. In a bowl, using a whisk, combine the flour, baking powder and salt. 
2. Add the shortening (and/or lard) and rub into the flour mixture until well incorporated.
3. Gradually mix in the water until dough comes together. It should be a medium-stiff consistency, not as soft as a bread dough but not firm either. Add addition water if needed a Tablespoon at a time.
4. Turn the dough out onto a floured surface and knead until smooth.
5. Divide the dough into 12 portions and roll each into a ball. Set the balls on a plate, cover with plastic wrap, and let rest for at least 30 minutes.
6. Flatten the ball of dough, flour it, then roll forward and backward across it once. Rotate a sixth of a turn and roll forward and back again; continue rolling and turning until you reach the desired circle size. Roll all of them before going to the next step.
7. Heat an ungreased griddle or cast-iron skillet over medium to medium high heat.
8. Lay the tortilla on the hot skillet, there may be a little sizzle noise and you see bubbling across the surface.
9. After 45 seconds or so, when there are light brown marks on the bottom, flip it over and cook for another 30 - 45 seconds until the other side is slightly browned. Be careful not to leave it too long or it will become crispy.


10. Remove from the skillet and place on a dry cloth. Repeat the process with the remaining tortillas and stack them one on top of the other on the cloth. 

Happy Home Cooking Pro style!!!